Launch mode for dummies
Launch mode is designed for the hydrographic launch being out and about and coming back with data to process. Currently, they come back with data on a drive and we organize it as we process.
Charlene wants to do this a little differently. If we setup the drive beforehand, we can carry over the structure and folder names to make all the organization go away. Charlene will move the data, verify the transfer went well and do all the processing we need. Magic! So let’s check out the steps.
Create a New Launch Transfer Drive
So you want to Charlene? Well, lets first get a transfer drive going, before the boat leaves. Take a USB Harddrive, plug it in to your computer, and open up Charlene. Click on Tools - Create Launch Transfer Drive.
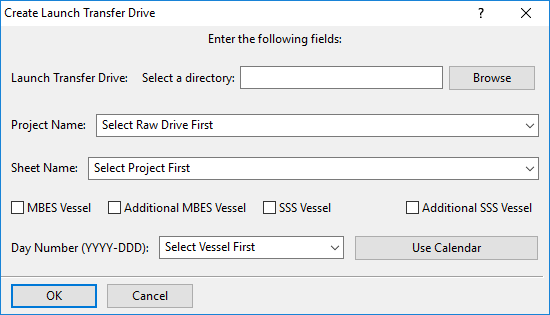
Let’s say you got one vessel, doing some multibeam work. If we pretend your external harddrive is the E:drive, your launch transfer drive box would look something like this: NOTE: Make sure that the vessel name in the Create Launch Transfer Drive window is the same as your hvf name, without the ‘.hvf’!
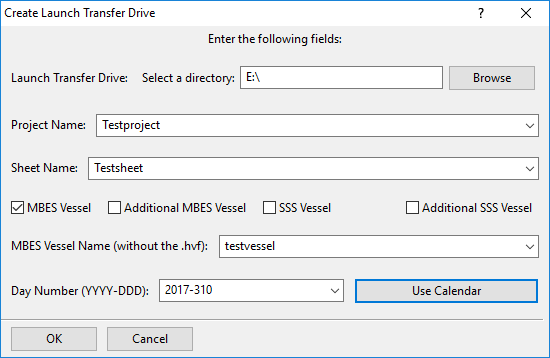
And once you hit ‘OK’, you’ll see a new directory structure pop up on the E:drive.
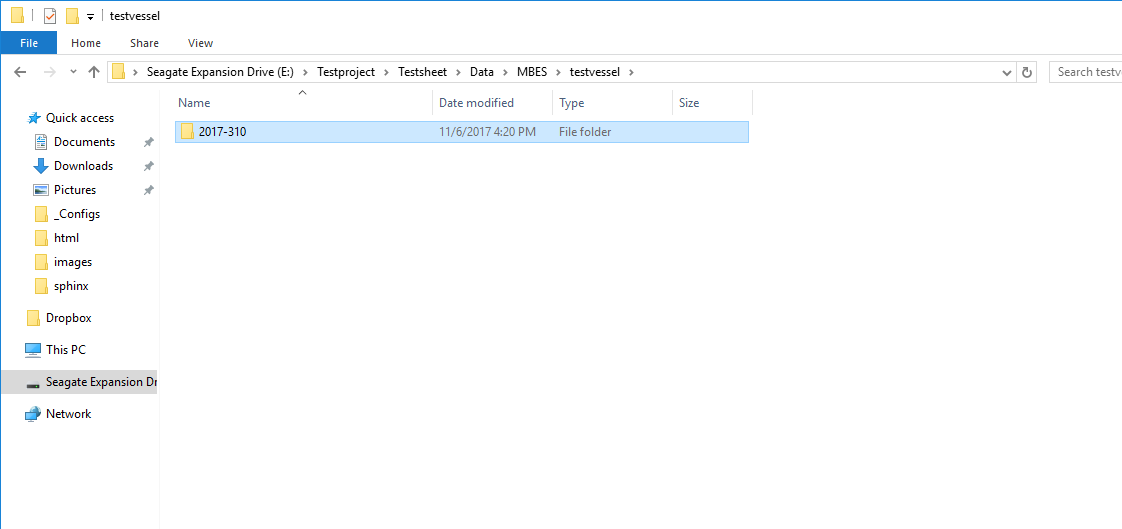
All you got to do is take this drive out with you, and collect multibeam to the multibeam day number folder, POSMV to the POSMV day number folder, and so on. Everything should go into a day number folder. Tomorrow, you run the Create Launch Transfer Drive again, and just change the day, leave everything else the same. It’ll take your existing drive and add a new day number folder right in to it!
Process Modes
Go ahead and start up Charlene from Pydro Explorer.
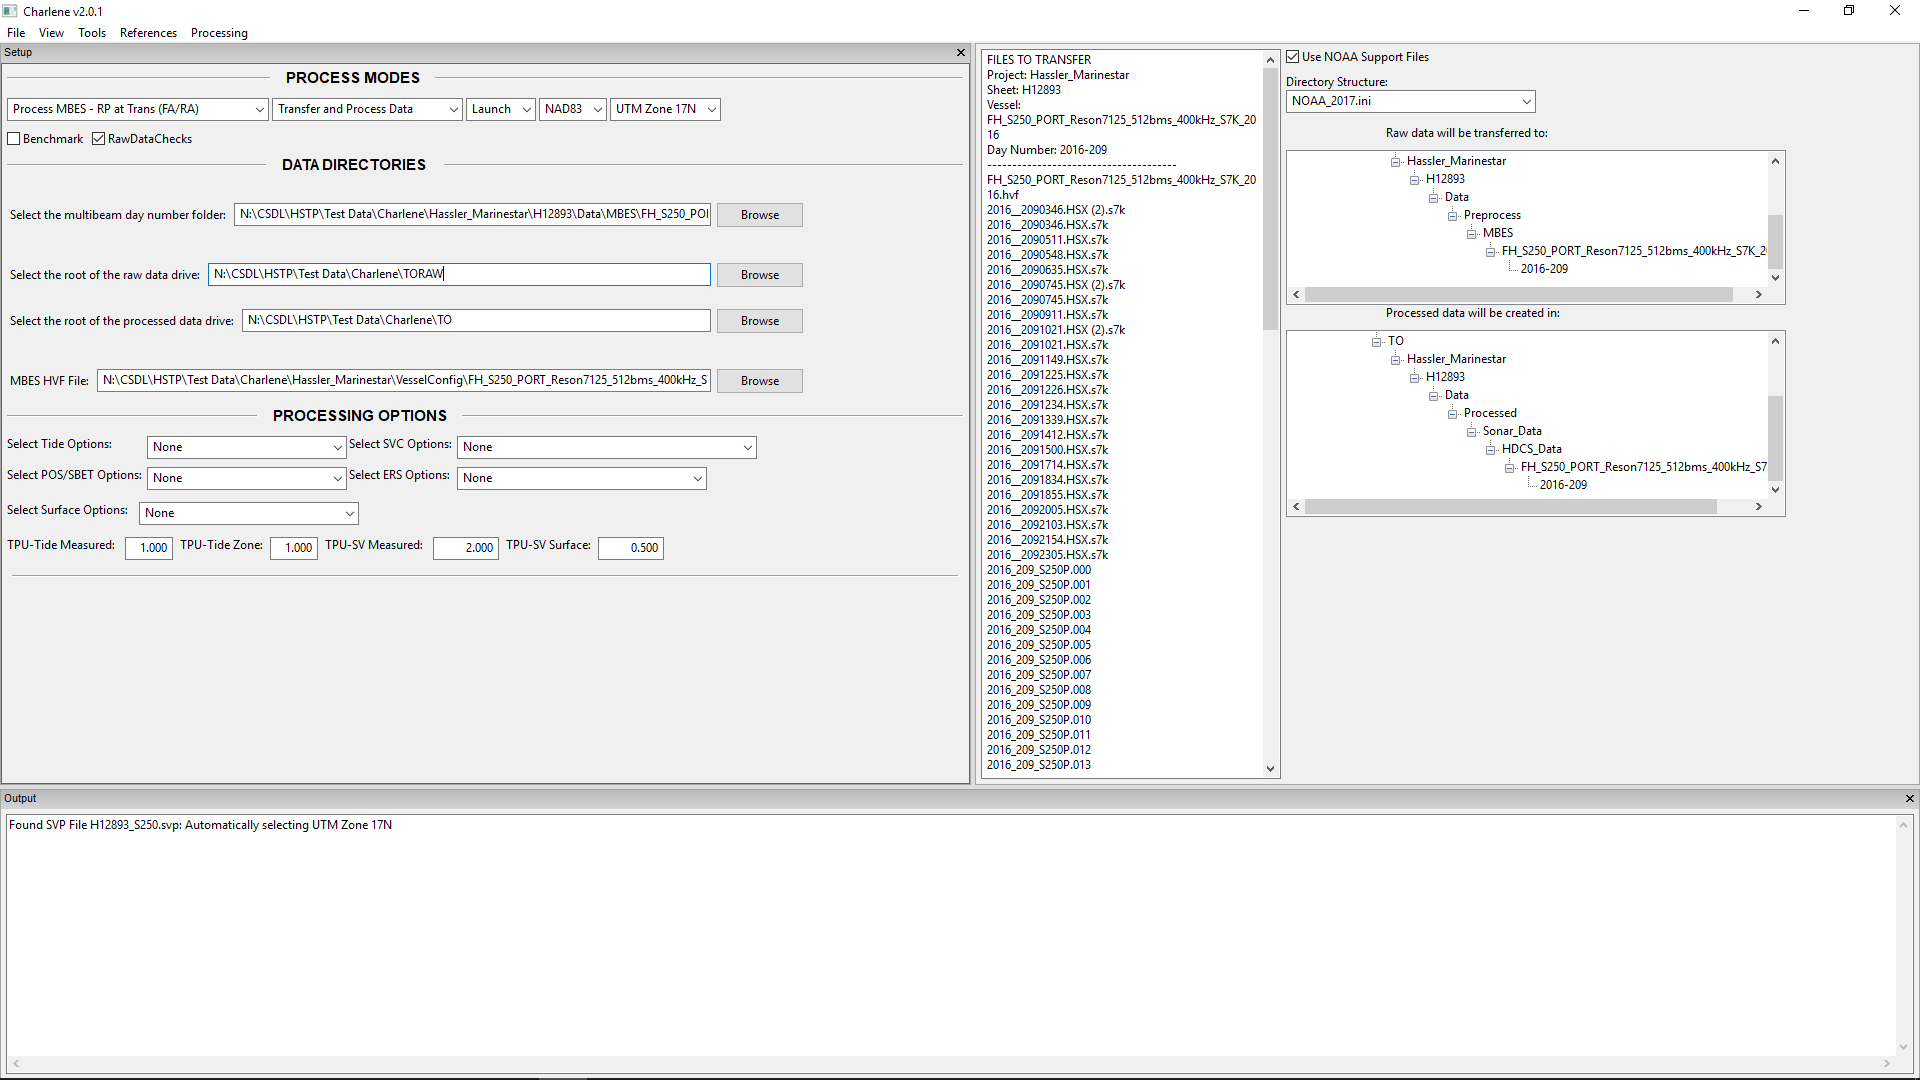
Process modes are all the things on the top of the screen. For processing a new day, choose the ‘Process MBES...’ mode that matches the vessel you are on. Process MBES - RP at IMU (TJ/FH) for the Jefferson and the Hassler. Rest should fall into the FA/RA mode. You’ll want to ‘Transfer and Process Data’ using ‘Launch’ mode and probably ‘NAD83’. If you have svp files, Charlene will autodetect UTM Zone. Otherwise, you’ll want to pick it. Check RawDataChecks if you want to analyze your raw data for things that could cause Charlene to fail. Recommended you check this. That should summarize everything you’ll need to do up top.

Once we pick the other options, you might need to come back up here and pick ‘AutoQC’ or some other checkboxes, but for now, let’s move on to...
Data Directories
Now we get into pointing Charlene at the directories where our data lives.
Go ahead and use the ‘Browse’ button to find the mulitbeam day number folder on your launch transfer drive. When I say multibeam day number folder, I literally mean the folder called ‘2017-123’ or whatever that is in the Data\MBES\Vessel folder. Point to that, and Charlene will know where everything else on the transfer drive is. Then just point ‘raw data drive’ and ‘processed data drive’ to where you want your raw and processed data, and use the MBES HVF file button to find your hvf. At that point, you should see a few things, that are great ways to know if you did it right:
- The ‘FILES TO TRANSFER’ window just to the right should populate with everything about your day. Make sure the info is right and the files are all there.
- To the right of that window are the folder structures that are going to be created. If you don’t like what you see there and want the Caris processed data to live somewhere else, here’s where you find that out before you hit start!
- Right above those folder structures, you’ll see a few options. These two options (NOAA Support Files and Directory Structure) represent the NOAA Specific stuff that can be enabled or disabled if you choose. The NOAA Support Files checkbox allows you to disable/enable NOAA Caris support files. These are used during surface generation. If you don’t have this checked, it will use default parameters. The Directory Structure box specifies with version of the directory structure you want to use. Using NOAA_2017 will use the NOAA 2017 Specifications and Deliverables mandated directory structure. You can build your own ini file if you wish to use a different structure.
Processing Options
Now the fun stuff, how do we want to process our data? Check out the modes section if you want all the details, I’ll just give you an example and explain whats going on:
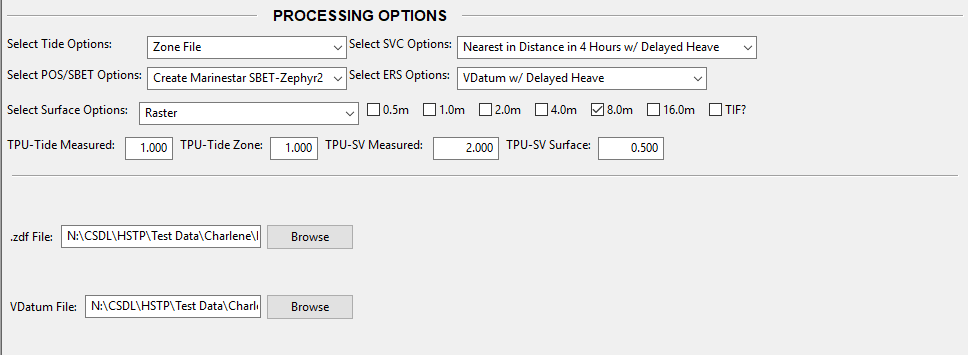
This is basically an east coast Marinestar wokflow. Here we:
- Create a Marinestar SBET in POSPac and copy it over to our new directory structure
- Convert our Kongsberg data according to the TJ/FH workflow
- Load Zone tides with a zdf file just like we would in Caris
- Load our SBET for height/nav and Load our .000 files for delayed heave
- Use the Caris Nearest in Distance in Time - 4 hours to apply sound velocity
- Use our VDatum surface for Caris compute GPS tide to get to the ellipse
- Merge with gps tide (since we computed it) and delayed heave (since we imported it)
- Compute TPU with all the settings we have in Charlene (entered in those boxes labeled ‘TPU’
- Generate an 8m raster surface
Since we chose a surface and are creating an SBET, you’ll see ‘GridQA’, ‘FlierFinder’ and ‘HolidayFinder’ show up for QCTools options and AutoQC show up for SBET options. Check them if you want to run any of these tools.
Let’s go!
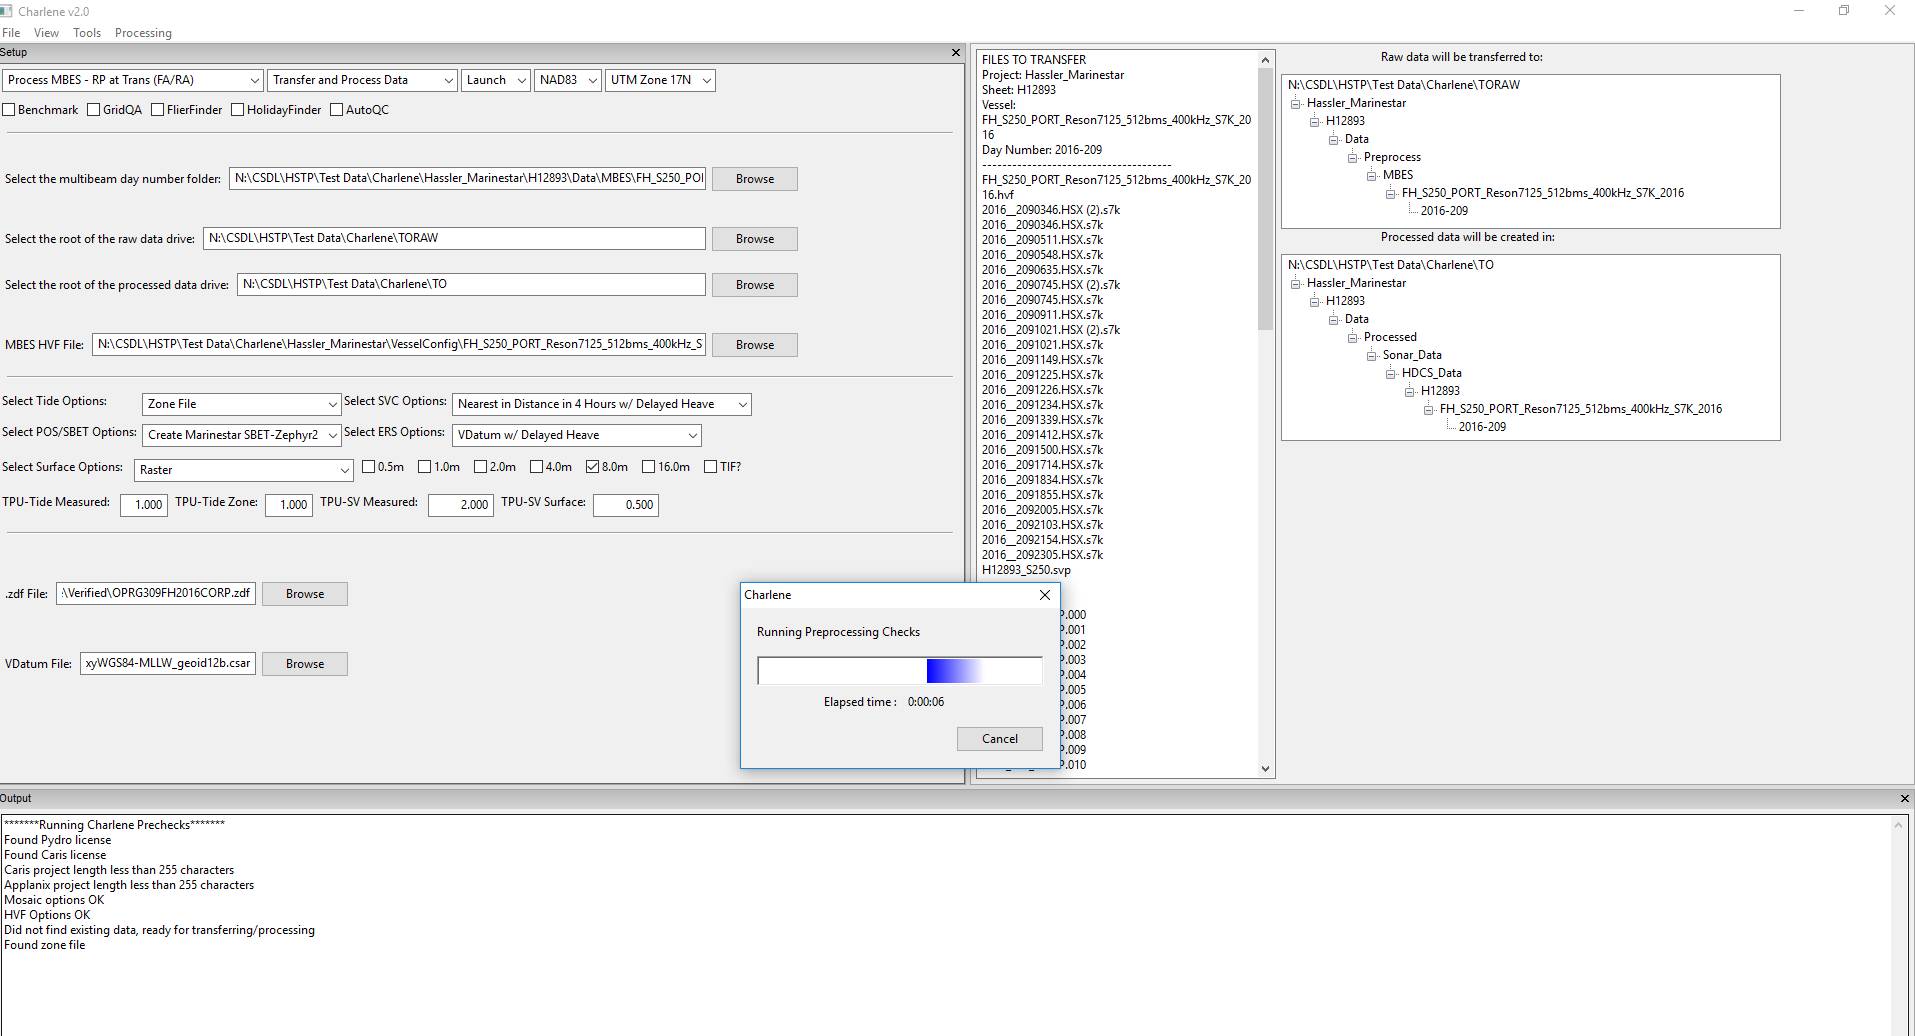
Go to the top and select ‘Processing - Start Processing’ to start. You’ll see it go through a few different modes:
- Precheck mode - Runs Charlene’s 37 parameter check to ensure that all settings are valid for the data that you have. If you don’t pass one of these checks, it’ll halt the process and let you know what to fix.
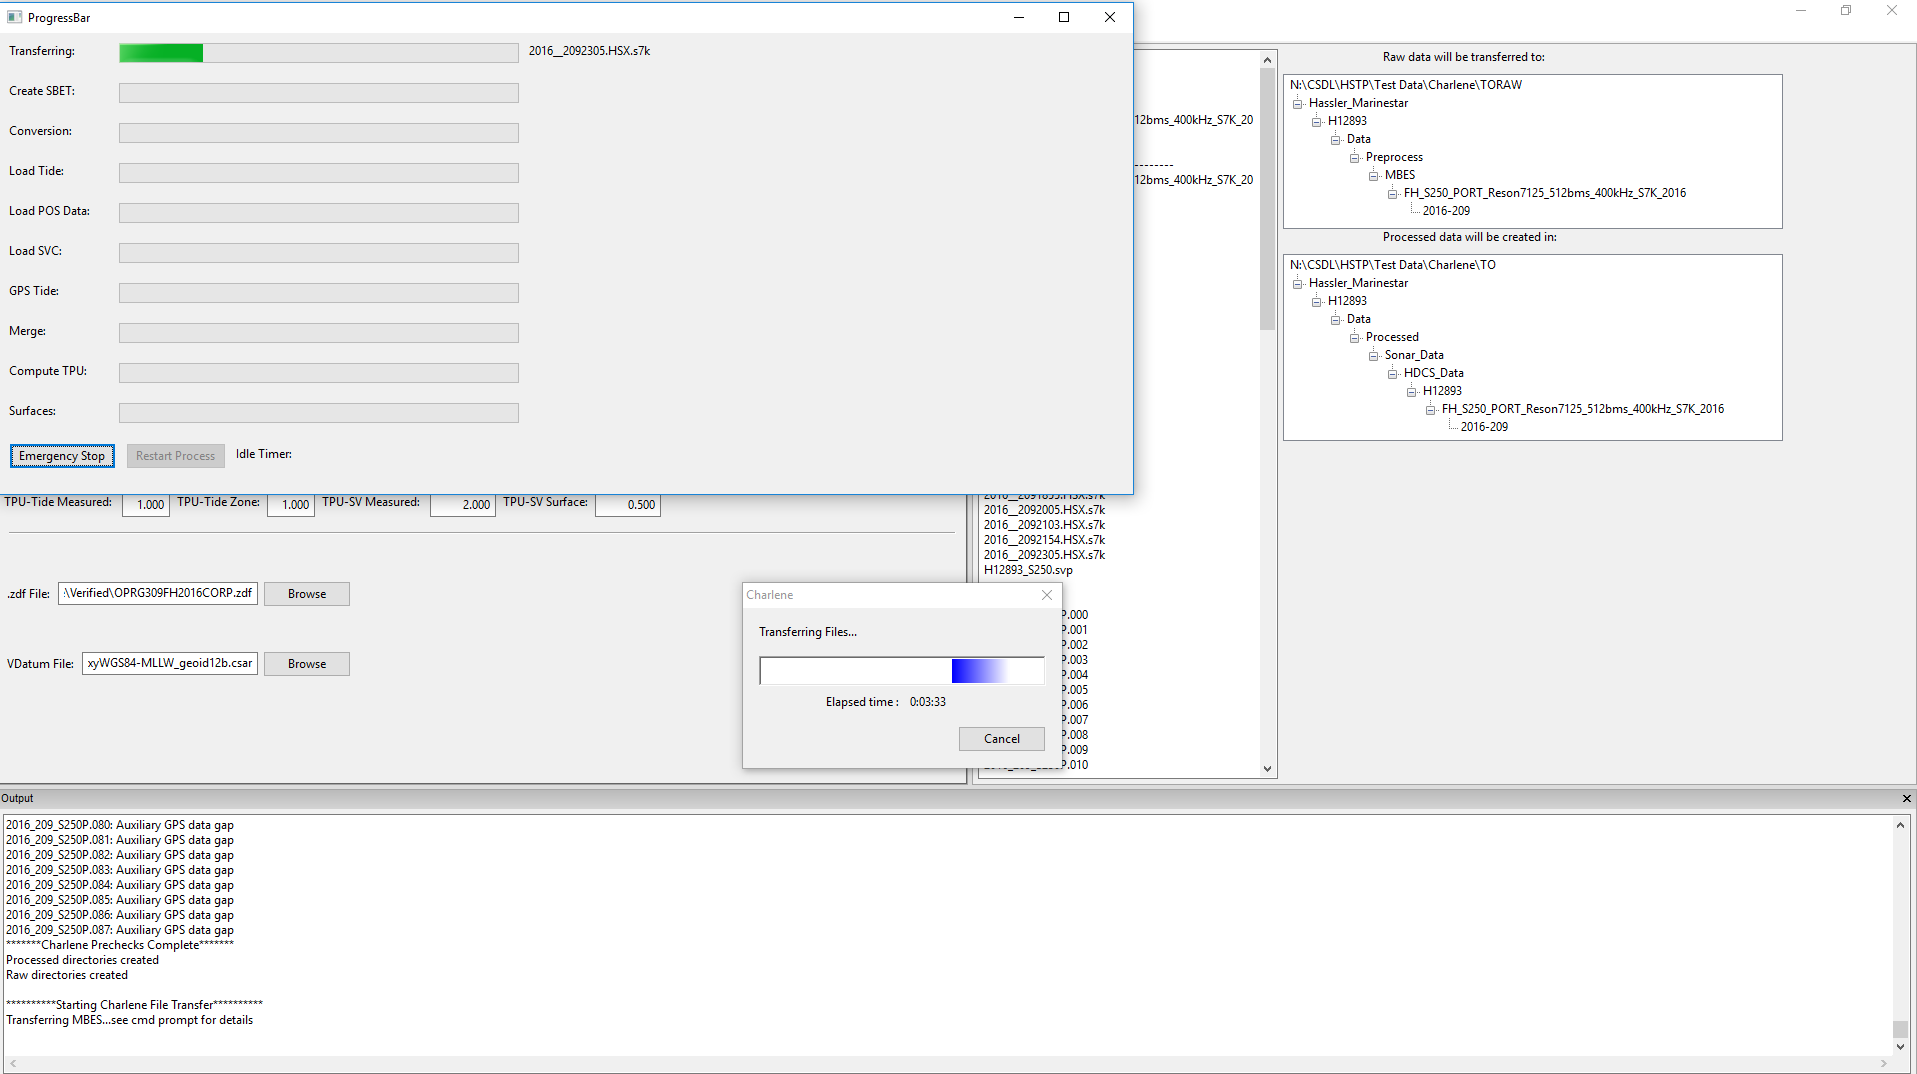
- File Transfer mode - Creates all directory structures according to the NOAA Specifications. Transfers data using Windows Robocopy and verifies transfers using Python tools.
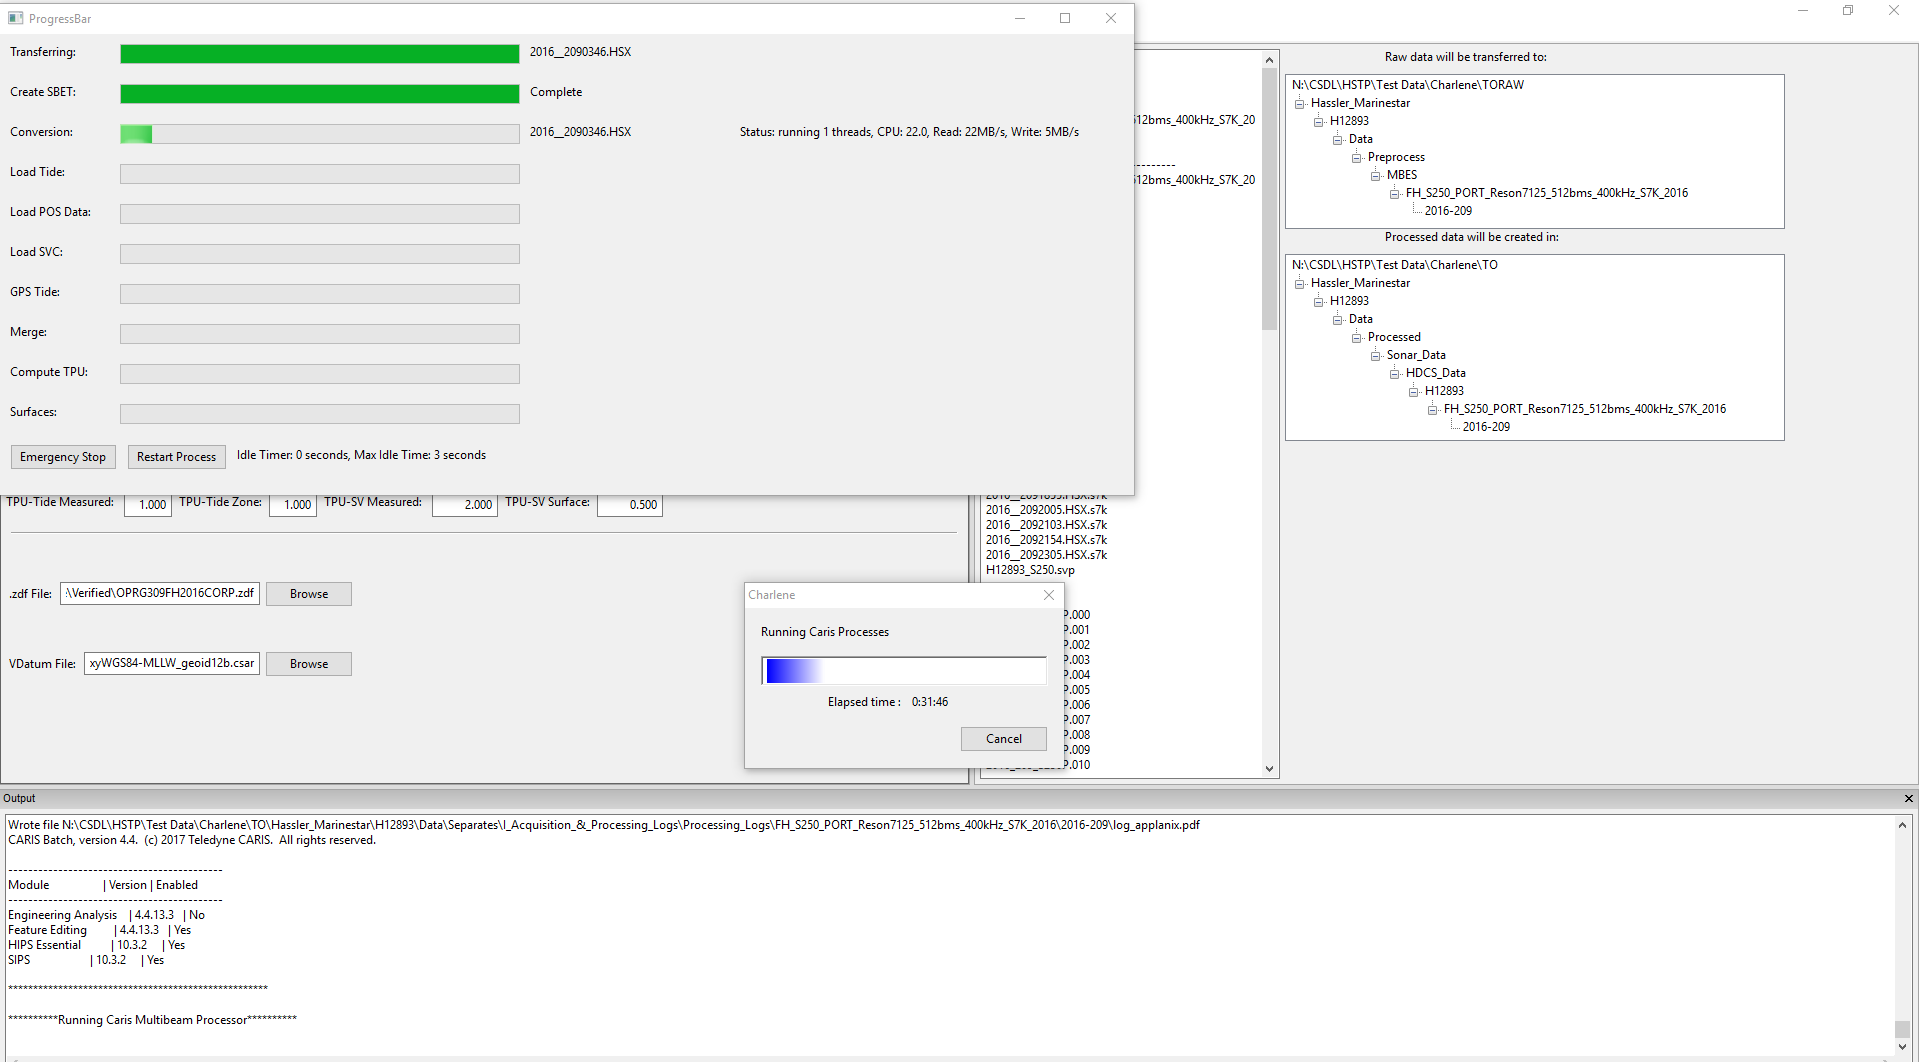
- Create SBET (POSPac) - Charlene will first create an SBET using POSPac Batch Processor. You’ll get some messages in the output window and you can track your progress in the ProgressBar window on top.

- Caris Processing (Caris/Pydro TCARI) - Charlene will then do all the Caris processing, including loading your newly created SBET!
Finally, Charlene will open up a Caris session and let you see your newly processed data. Take a look and make sure everything was created as you wanted it to. Review the output window in Charlene to make sure it all makes sense. Everything in the output window will also be saved to the processing logs folder in the processed data directory structure.
Resources
- Online Resources:
Contact
If you find errors in the documentation or want to contribute, you are encouraged to email the following personnel emails @NOAA.GOV
- barry.gallagher
- jack.riley
- chen.zhang
- eric.younkin
